How to Move an Elliptical
Moving an elliptical trainer to a new location can be challenging, but with the right preparation and technique, you can move your machine safely and efficiently. An elliptical is a valuable exercise investment, so taking the time to move it properly will ensure it continues functioning optimally for years to come.
The process of relocating an elliptical has a few common pitfalls. The machine is bulky and heavy, which makes maneuvering it difficult, especially through tight spaces like doorways and halls. People also often underestimate how much space is needed to set up the elliptical in the new location. With some planning and careful execution, these obstacles can be overcome smoothly.
The goal of this guide is to walk through the How to Move an Elliptical Guide step-by-step. We’ll cover everything from disassembly to transporting the components to reassembly in the new space. Follow along carefully, and you’ll be able to move your elliptical trainer safely while avoiding damage or injury. With the right precautions taken, you can have your elliptical up and running in no time in its new home.
Contents
Preparation
Proper preparation is just as important as the process itself. Therefore, it is recommended to initially think through all the details and consider each stage of the work and prepare everything necessary.
Necessary Tools and Supplies
Before getting started on moving day, you’ll want to make sure you have the proper tools and materials to safely disassemble, transport, and reassemble your elliptical. Having the right equipment will make the entire process smoother and prevent any damage. Here’s what you’ll need:
- Adjustable wrenches – Used to loosen and retighten bolts during disassembly and reassembly. Having multiple sizes ensures you can handle all bolt sizes.
- Hex key set – Allows you to access hex bolts in confined spaces. Necessary for removing cover panels and accessing internal components.
- Pliers – Helpful for pulling pins during disassembly. Needle nose pliers can reach into tight areas.
- Screwdrivers – Both Phillips and flathead screwdrivers can aid in removing screws during disassembly.
- Carrying straps or lifting straps – Makes carrying large, bulky components like the frame safer and easier.
- Furniture sliders/dollies – Sliding the elliptical on these devices prevents floor damage and reduces strain.
- Moving blankets – Protects all components and surfaces from scratches during transport.
Having the necessary tools prepared ahead of time ensures the disassembly process goes smoothly and reduces safety risks. The right equipment also prevents you from encountering unexpected challenges that can damage the machine. With the proper tools on hand, you’ll be ready to take apart your elliptical safely.
Measure Doorways and Hallways
Before attempting to move your elliptical, it’s critical that you measure any entryways, hallways, or passages you’ll need to pass through. An elliptical is a large, bulky item, so you need to ensure ample clearance.
Taking measurements in advance prevents you from encountering obstacles mid-move. Check the width of any doors, thresholds, or hallways the elliptical will travel through. Measure at both the top and bottom to account for tapering. For especially tight spots, measure the elliptical itself in the orientation it will pass through.
If measurements reveal any openings too narrow for the elliptical, you have a few options. First, consider rotating the machine vertically to fit it through upright. If that isn’t possible, look into removing door casings or hinges to expand the width. As a last resort, there are companies that specialize in removing walls to accommodate oversized equipment.
With a few simple measurements, you can determine if any trouble spots exist along your proposed moving route. Taking note of potential size constraints allows you to plan accordingly. Adjusting your route or expanding tight spaces will ensure no roadblocks arise on moving day.
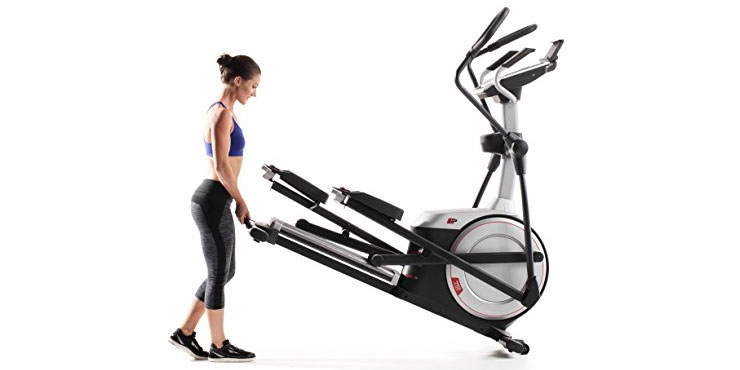
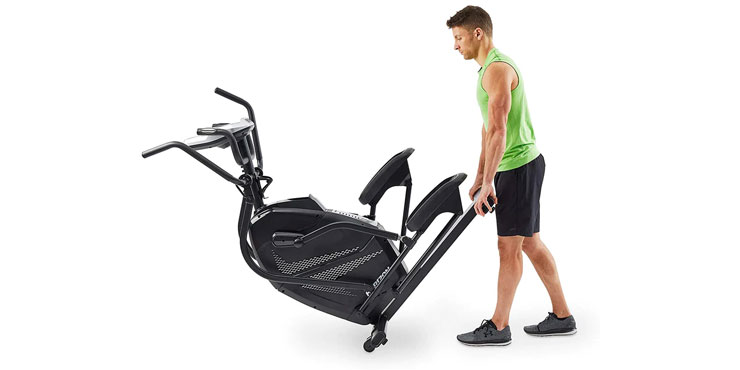
Move elliptical without disassembly
While it’s recommended to disassemble an elliptical for moving, there are ways to relocate the machine fully constructed if needed. This avoids the work of taking apart components, but requires extra caution. You’ll still need to remove pedals, handlebars, and the console for transport. Detach anything protruding that could get damaged or cause issues fitting through doorways.
Use a furniture dolly designed for heavy appliances. Carefully tilt and balance the elliptical onto the lowered dolly. Secure it with straps to prevent shifting. Keep the machine upright, as laying it horizontal can risk internal damage.
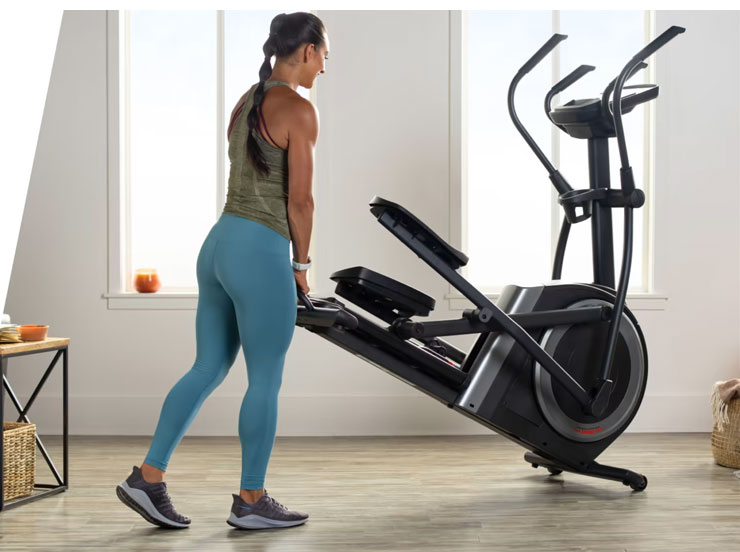
Wheel the elliptical slowly and steadily. Pivot it to maneuver through tight spaces, taking care not to knock loose any parts. Go easy on inclines or uneven surfaces. Recruit at least 2 strong helpers to keep the bulky elliptical balanced during transport. Prevent it from tipping by gripping firmly and moving deliberately.
Once in the new space, lock wheels and gently tilt the frame off the dolly. Reinstall removed parts like pedals and console. While more challenging, skipping disassembly is possible by using caution, a good dolly, and plenty of assistance. Just take it slowly to protect both the machine and movers.
Secure Elliptical’s Manuals
Before disassembling your elliptical, take a moment to secure any loose items and critical documentation. This includes the user manual, warranty information, assembly instructions, and small hardware like bolts and washers. Having these items on hand will make reassembly much smoother.
Be sure to keep the user manual and warranty paperwork in a safe, dry place. You’ll need to refer back to the manual when reassembling and recalibrating the machine. It also contains important specifications and troubleshooting advice.
The assembly instructions are likewise crucial, as they provide visual diagrams demonstrating how to put the components back together. Study these closely during disassembly so you understand how the parts interconnect.
Finally, use resealable plastic bags to contain any small hardware or fasteners removed from the machine. Label the bags clearly so you know which screws go where. Keeping these organized prevents any shortages or mixups during reassembly.
Taking the time to safely secure these accessories ensures you have all the necessary information and parts to smoothly recreate your machine in its new location. Don’t risk misplacing small items that are vital to proper functioning.
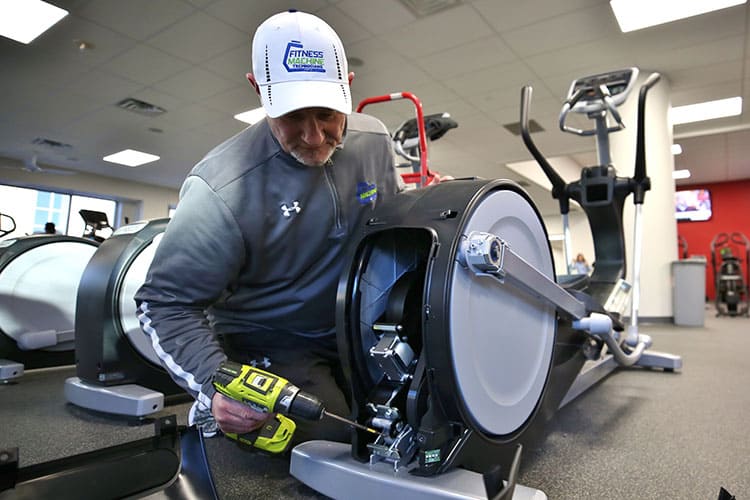
Disassembly
Before going any further, you’ll want to make sure your elliptical is powered off and disconnected from any power source. This prevents electric shocks or component damage during disassembly.
Refer to your user manual for instructions on properly shutting down your specific model. In most cases, you’ll press the power or shutdown button and wait for the console to power off entirely.
Once powered down, unplug the AC adapter from both the outlet and elliptical console. Make sure to grasp the plug, not the cord, when unplugging to avoid damage.
For built-in consoles without an AC adapter, locate the cord connecting directly to the outlet and carefully unplug it. Use caution, as the outlet may be difficult to access.
With the console powered down and unplugged, electrical components are safe to handle during disassembly. Just be sure to store the cord safely so it doesn’t become damaged. Take the proper electrical safety precautions, and you can dismantle your elliptical without risks.

Start disassembly by removing the external components that are easy to detach. This includes the pedals and handlebars on either side.
For the pedals, locate the thread release levers or nuts. These allow you to unscrew the pedals from the crank arms. Use a wrench to loosen and unthread the pedals completely. Detach both left and right.
Removing the handlebars usually involves loosening screws or bolts that attach to the arms. Use a hex key or screwdriver to access these fasteners and detach each side. The display console may also need disconnected by unplugging cords and removing mounting hardware.
When removing parts like pedals and handlebars, be sure to keep all related screws, washers and bolts organized. Place them in labeled bags for easy reinstallation later. Make note of how the components are positioned and interconnected as well. Taking photos along the way can help.
With the external components detached, you can move on to dismantling the inner workings and frame. Carefully removing pedals, handlebars and the console readies the elliptical for further disassembly.
Label and Organize Parts
As you disassemble the elliptical, make sure to clearly label and organize all removed components. Keeping everything in order will ensure reassembly goes smoothly and efficiently.
Use masking tape, sticky notes or resealable bags to label parts, especially those with specific left/right orientations or positions. For example, mark “Left Pedal Arm” or “Front Stabilizer Bar”.
Small loose parts like bolts, washers and screws should go in bags labeled with their corresponding components. For example, group all handlebar screws together in a bag marked “Handlebar Hardware”.
Take photos of the elliptical before and during disassembly to reference the positioning of components. Also keep the instruction manual on hand, noting any insightful diagrams or directions for reconstruction.
Finally, neatly arrange all parts to keep them protected and easy to locate. Heavier items can be placed in boxes and lighter parts bagged. Maintaining organization from start to finish prevents confusion and ensures no components get misplaced.
With a systematic approach to dismantling and labeling parts, you can make reassembly a straightforward process. Carefully organizing each piece makes putting the elliptical back together a breeze.
Moving on the Same Level
Once your elliptical is fully disassembled, you can start maneuvering the components to the new location. For moving it across the same level, furniture sliders are extremely helpful. Position sliders under the heaviest sections like the frame rails and base. You may need an extra set of hands to lift while positioning the sliders. Make sure the elliptical is balanced and stable.
To move the machine, carefully tilt and push the component onto the furniture sliders. Take care that no parts shift or slide out of place. Gently roll the elliptical along the sliders towards the destination. Align the elliptical and any accessories in the appropriate positions and orientations in the new space. You may need to pivot the machine to fit through doorways. Remove sliders gradually once in the final location.
Sliding the elliptical along the floor prevents scratches and damage while reducing strain. Furniture sliders allow a smooth transition to the new spot. Just be sure to work slowly and stabilize all parts during the move.
How to Move an Elliptical by Yourself
Relocating an elliptical by yourself takes strategic planning and caution. Without extra hands to help, you’ll need to take steps to move components safely while maintaining control. Work methodically by moving one piece at a time. Prioritize lighter parts first before attempting large, heavy sections like the frame or base. Use leverage by tilting and rocking pieces onto dollies or sliders.
When moving bulky parts like the frame, make sure they are fully balanced and stable before sliding. Keep the component low to the ground and move slowly to avoid tipping. Take frequent breaks if needed. You may need to temporarily detach certain extensions like arm rails in order to fit the elliptical through narrow doors and passages. Remove these strategically and reattach once on the other side.
Be extra attentive to proper lifting techniques when working solo. Bend knees, keep the core engaged and avoid twisting. Let the equipment do the work by utilizing ramps, lifts and sliders. Patience and planning will allow you to maneuver the elliptical on your own safely. Work slowly, leverage equipment and take breaks to preserve energy. With care, a solo move can be accomplished smoothly.
Moving Upstairs Step-by-step instructions
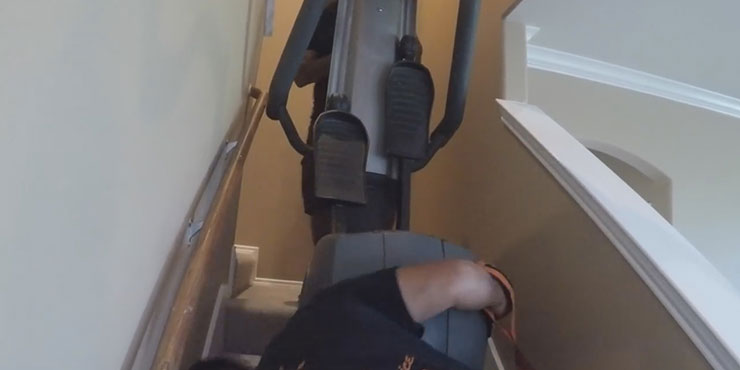
- Moving Upstairs. When relocating your elliptical to an upper level, special care and precautions must be taken to ensure safety. Staircases present unique challenges and risks that require planning.
- Safety Precautions. Moving any heavy object upstairs demands awareness and caution. Take it slowly, resting frequently to avoid injury. Make sure the stair route is clear of clutter. Discuss the plan and signals with helpers. Check that railings are stable and utilize them for support. Remain focused to prevent slips or tumbles.
- Enlist Help. Do not attempt to move an elliptical upstairs alone. The weight and bulk of the components necessitates at least two or three strong helpers. Coordinate which parts each person will carry and the order of transport. Extra hands provide better control and stability when navigating stairs.
- Using Moving Straps. Moving straps are essential for bearing weight and facilitating a firm grasp when moving upstairs. Attach straps securely around sections like the frame rails and base. Keeping the elliptical balanced, tilt the component to begin ascent, resting on stairs periodically. Adjust grips to find the most stable positions. With one person leading on stairs and others following with the weight, proceed cautiously. Pivot as needed but refrain from any abrupt motions. Keep communication open on timing and coordination. Once upstairs, detach straps gradually while stabilizing the elliptical to avoid toppling.
With ample assistance and moving straps, an elliptical can be transported upstairs as long as proper precautions are taken. But use extreme care, as stairs amplify risks.
Reassembly
Here is a draft section covering reassembly of the elliptical:
- Reassembly – Once the elliptical is in its new location, it’s time to put it back together. Follow the disassembly steps in reverse, using your labels, photos and instruction manual as a guide.
- Reattach Pedals and Handlebars – Locate the pedals, handlebars and console, and any respective hardware. Refer to labels and diagrams to determine proper left/right orientation. Thread the pedals back onto crank arms using wrenches and tighten securely. Bolt the handlebars onto the arm joints, ensuring all screws are fastened tightly. Reconnect console cords and mount the console if detached.
- Tighten All Screws and Bolts – As you reassemble the inner components and outer covers, routinely check that all screws, bolts and fasteners are tightened properly. Use your wrench set to confirm nothing loosens during transport. Review all assembly diagrams to guarantee everything is attached correctly. Tighten and adjust until the elliptical feels stable and secure, with no wobbling parts. Proper re-tightening prevents future instability or malfunctioning.
Carefully following the original assembly instructions in reverse order will ensure a smooth reassembly process. With patience and care taken to stabilize all components, your elliptical will be rebuilt safely and ready for use again.
Conclusion
Moving an elliptical trainer requires careful preparation, disassembly, transport and reassembly. But with the proper tools, equipment and techniques, the process can go smoothly. The key is taking a methodical, safety-focused approach.
Start by measuring entryways and formulating a plan of action. Gather all necessary tools and accessories to have on hand, like wrenches, straps and furniture sliders. Take photos and label parts thoroughly during disassembly. Move components individually, leveraging equipment for heavy lifting. Extra assistance is essential for navigating stairs.
During reassembly, refer back to manuals, diagrams and labels. Tighten all fasteners securely. Work slowly and focus on safety throughout the entire process. Proper precautions will prevent injury and damage.
Relocating exercise equipment can be challenging, but very doable with some guidance. For anyone preparing to move an elliptical, follow these tips closely for an efficient, safe move. And please share your own experiences or questions below!